Klutter - Getting Started in Android Studio
The Klutter Framework makes it possible to write a Flutter plugin for both Android and iOS using Kotlin Multiplatform. Instead of writing platform specific code twice in 2 languages (Swift + Kotlin), it can be written once in Kotlin and used as a Flutter plugin. In this tutorial we will create a new Klutter plugin project using Android Studio.
Before Getting Started
The only thing you need to have installed is Android Studio. All tools, including Flutter, are installed during the project initialization phase.
Install Plugin
First install the Android Studio plugin: In the Android Studio toolbar click on Main, Preferences and go to Plugins. In the marketplace search for Klutter. Install it and restart Android Studio. Check the plugin is enabled.

Note: For running the example app you will need to also install the Flutter plugin. Just repeat the steps above for Android Studio Flutter plugin.
Create new project
Open the new project wizard: In the Android Studio toolbar click on File, New, New Klutter Project… Now you should see the klutter wizard screen:
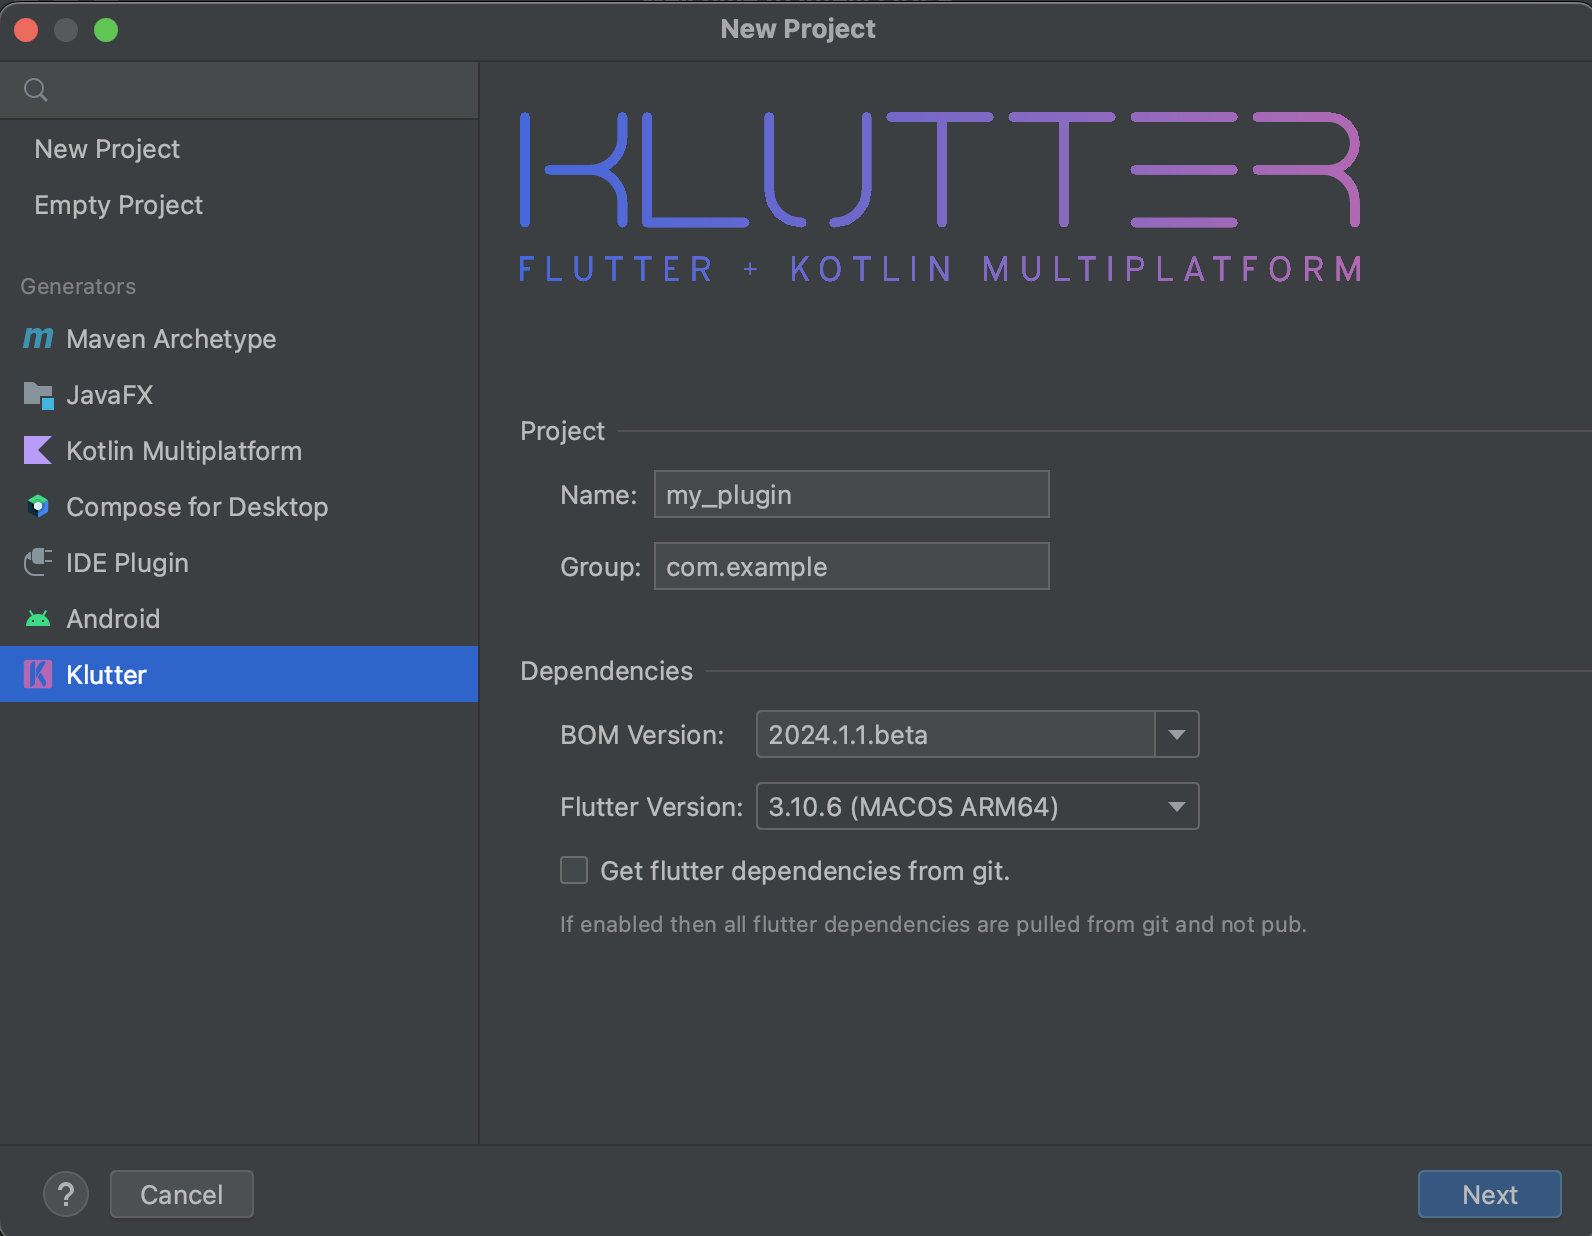
Enter a name and group for your plugin. This tutorial will assume the following:
- name: android_studio_tutorial
- group: com.example.studio
Whatever you choose, stick to the following naming conventions:
- Name and group should start with an alphabetic character.
- Name and group should be lowercase
- Name can only contain one of:
- alphabetic
- numeric
- ‘_’
- Group should start with an alphabetic character.
- Group can only contain one of:
- alphabetic
- numeric
- ‘_’
- ’.’
- Group contains at least 2 parts (e.g. there is minimally 1 dot)
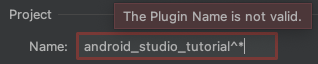
If the name or group is invalid you will get a warning:
The BOM version is more lenient, meaning it will display a warning if the given version is unknown. If you’re certain the BOM version does exist then this warning can be ignored. Selecting a BOM version from the dropdown box guarantees the correctness of the input, however.
By default, the latest (supported) Flutter version is selected. This Flutter distribution will be downloaded to the Kradle cache folder, so that it can be reused by all Klutter projects. The selected Flutter version is stored in the Klutter project.
Kradle is a new experimental CLI tool for working with Klutter, Flutter, Gradle and Kotlin Multiplatform.
Click on next, and you can enter a project name + location. This is the root folder where the project will be created. If you prefer to keep the name of the root folder and your plugin identical then just enter your plugin name for both fields.

Click create and wait for the project to be created. This will take a few minutes. The plugin will do the following:
- Create a flutter plugin project.
- Add klutter plugin to pubspec.yaml.
- Add klutter_ui plugin to pubspec.yaml.
- Execute klutter:kradle init bom=2024.1.1.beta flutter=3.10.6.macos.arm64.
- Execute klutter:kradle add lib=android_studio_tutorial.
See the documentation to learn more about these flutter tasks.
Build project
Great, with a few clicks we have generated a new klutter project! Let’s verify everything works. The project should be recognized and linked as a Gradle project automatically. If not, then in the project view, right-click on the settings.gradle.kts file and select Link Gradle Project.
Note: Sometimes the sync does not work properly the first time. If that’s the case, go to the Gradle task bar, right-click the project and select Reload Gradle project.
In a terminal run the command below. This will build the required artifacts for both Android and iOS. Grab a coffee, it might take a while…
./kradle build
If kradle is not installed then you can use the GetKradle Task to import it into your project using Gradle (and then rerun build):
./gradlew klutterGetKradle
Alternatively you can build the platform module directly with Gradle:
./gradlew build -p "platform"
Make sure there are no error messages when the command is finished. In the root/android/klutter folder there should now be a platform.aar file. For ios there should be a Platform.xcframework folder in root/ios/Klutter containing a framework for simulators and iphoneos.
Run app
The project is set up and the app is build. Let’s run the app to check everything works. Open a terminal in the root folder and run:
flutter pub get
This should execute pub get in both the root and root/example folder. If not then go to root/example and do flutter pub get again.
In a terminal go to root/example/ios and run:
pod deintegrate
and:
pod install
When successful then the terminal should display a message similar to There are 2 … total pods installed.
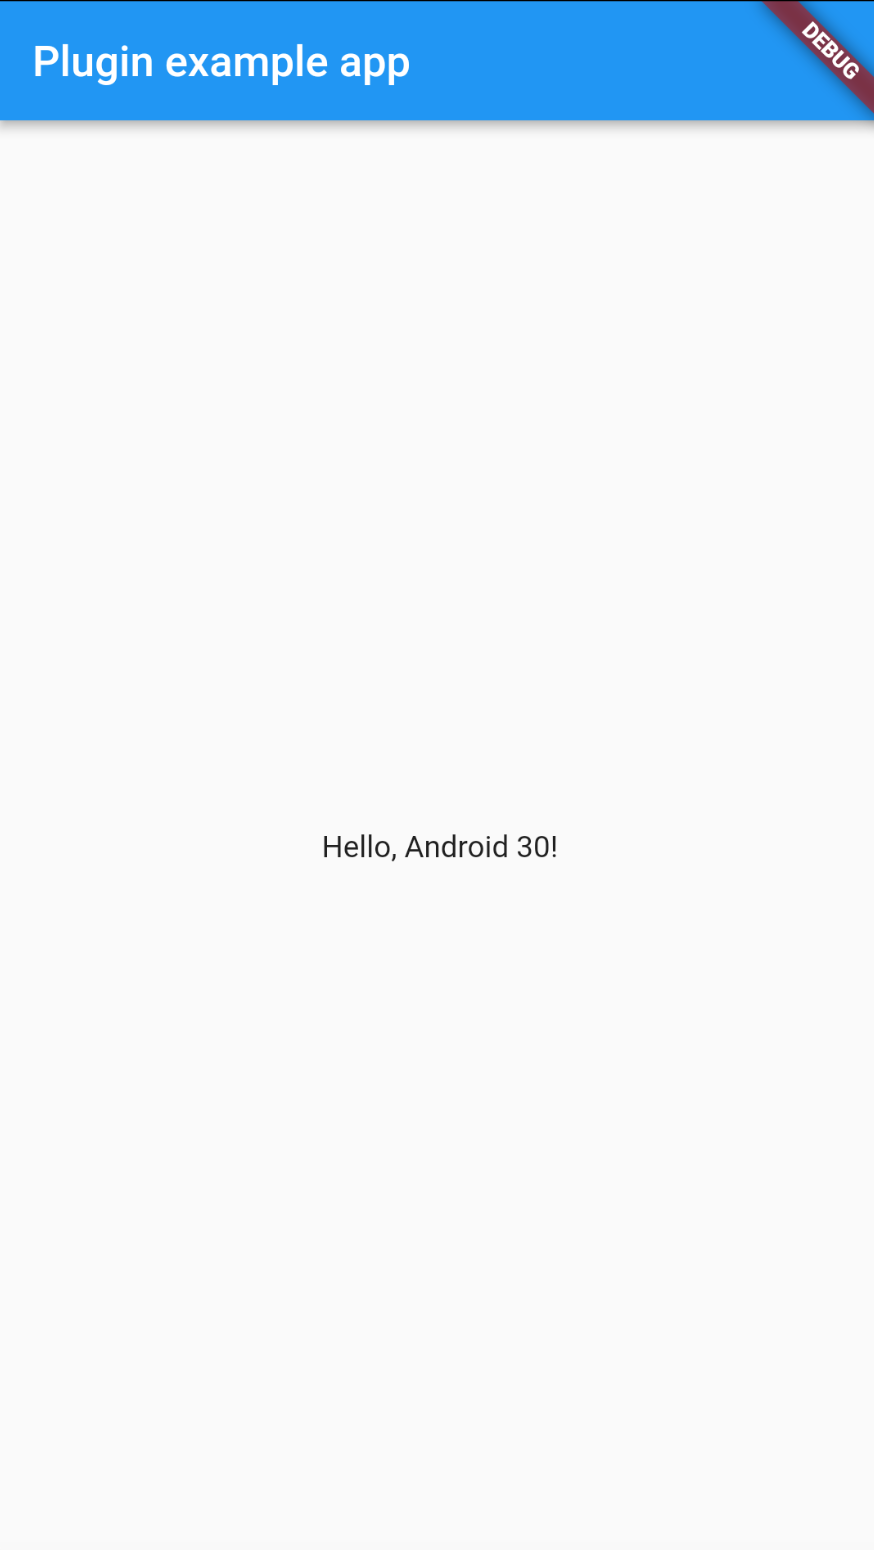
Open an Android emulator and iOS simulator. In the Android Studio project view go to root/example/lib and open the ‘main.dart’ file. Select your Android emulator in the top bar and start the example app from the main method.
Now select the iOS simulator and start the example app from the main method.
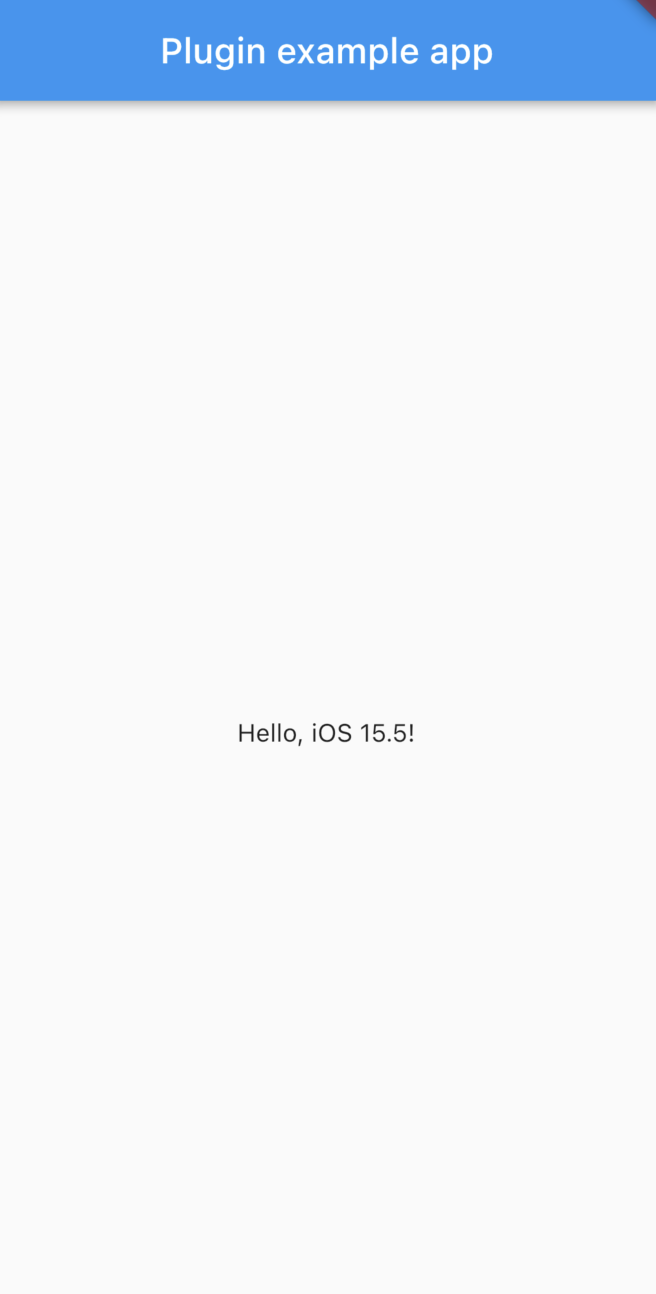
And that’s it. Congratulations on your first Klutter plugin made with Android Studio!
Is anything missing?
If anything is missing or seems confusing on this page, please share your feedback.